Tonic Surprise Bouquet Card Set...with LOVE

Hi friends, This is a short but simple post made with lots of love!
I am sharing the card set I recently made using Tonic Dies: Surprise Bouquet. They are versatile, elegant, and offer so many possibilities with only this one set. 

To make this card set, I used Vellum in vibrant colors, as well as Nuvo markers in coordinating glitter colors. I also used another adorable die set from Tonic to add small flowers to one of the card toppers. 
The results were amazing, and I am hoping my mother enjoys using them, as they were a small gift for her birthday. 

The gorgeous bee is from Spellbinders, and in my video, I share this, as well as other details and a bonus card you won't see here. Go on over, subscribe, leave a kind comment, and 
Be inspired, Be blessed! 
Raquel 


How do you Embellish??

Hi friends, 

Some of us are addicted to details, details, details!!

I am guilty of looking at embellishments in a store, and walking away a bit...underwhelmed. To ensure I'm not left with that feeling, I like to challenge myself, and when this happens, I always discover something fun I like to do!
Here I found out that my dies like to have a "Buddy"
This stash of embellishments that will be ready for me when I want to add that special little something to one of my projects. After all, a girl can never have too many pretty things!

 I looked for dies in my stash that fit the same theme, and made the most of them with beads, sequins, flowers, you name it!
I used my Cricut , several dies, Maggie Holmes papers, and several coordinating items.
 The idea here is to have fun with the items in my stash, and layer items that I feel "fit" well with each one another. 
It can be color, texture, shape, or theme. Find something you like, and then, find its buddy!

Making sure to keep things balanced, and adding sparkle her and there with pearls and sequins allowed me to keep these ultra girly pieces looking cohesive and not overdone.

These TUTU rosettes just came to me, and I am sooo in love with the results! I can now add these to gift bags, mail, wands, or the cover of a card or mini album! 

The same is true for these shaker cameras. They look great just sitting on my desk, but I must make room for more!
I hope that you had fun looking through these pictures! Prefer a video?
Watch me here:


Be inspired, Be blessed!
Raquel

Memory Dex Card and Gorguss Shaker

Hi friends, 
I am sharing some of the latest embellishments I decided to make in a rosette style, as well as an adorable Shaker topped Card  and Memory Dex card I made to go share with a fellow blogger and youtuber.
These little embellishments were easy and fun to make!
I began by uploading a designed I liked to my Cricut Explore Air 2, This allowed me to cut several ballerina shoes. I decided to make them in Gold mirror Cardstock and Vellum. This is always my preferred way to make delicate embellishments.

I also added leaves from a different die set, and topped the rosette with the die cuts, tulle, and several sequins. To make the shoes "pop" I embellished them with pink seed beads, sequins, and enamel.
It all got finished with little flowers and bows.

To make this set, I also used a Gorguss stamp, and a Tim Holtz die in the shape of an antique Clock. To make it a shaker, I filled it with sequins, and layered it with acetate, creating the perfect window effect. To cut the background, I cut the same shape using my Cricut and a scanned image of the same clock.

Here is how I packaged this lovely card set. It's a great way to share a little about yourself and your personal style.

I made a frilly embellishment by fussy cutting the sentiment image. I also added three little pearls for sparkle.

I love adding dimension to my cards, This one has it all! Leaves, washi, crochet lace, tulle, and even a hand-painted leaf I made using plaster.

Here is a close-up of the shaker with the perfect twinkle!

I hope that you have liked this post. 
To see more, feel free to watch, like, and subscribe to my youtube channel where I shared this project!


Be inspired , Be blessed!
Raquel

Gorguss Tick Tock Project...and the reason behind my projects


Hi friends, 
I am so very thrilled to be able to share my work with like-minded crafty friends, artists, and the like. 
Much of what we do brings meaning to our every day lives, and for me, it goes a little deeper.
My true hope is that every item I gift bring along with itself a feeling of love, encouragement, and a reminder to take the time to appreciate the little details that make each of us uniquely made by God.
My message with this is :

We are a Blessing to others when we Commit to God 
ALL that we are. 

How? 
Live for Him, and God will provide you with a sense of fulfillment in all that you do. 


Live for God, and He will surround you with inspiration.


Live for God, and each minute you dedicate to seeking Him will be a moment well spent.


Isaiah 40:31 says:
...but those who hope in the LORD will renew their strength. They will soar on wings like eagles; they will run and not grow weary, they will walk and not be faint...

What a wonderful promise from up high. I hope to rest in the promises of God in my daily walk, and in turn, inspire others to never give up, regardless of circumstances that may have shaped them, or affected them in any way...

This is the reason I can appreciate paper arts. There is something that happens when we convey love in a tangible way, It helps others remember a moment in which they have felt loved, and little images, little details, however small, can add up to make a positive impact in the lives of others. 


I try not to take these little moments for granted, rather, make the most of them. After all, they add up to be expressions of my thoughts toward others. 

Isn't it good to fill your mind with positive thoughts, and your life with actions that mimic what you're thinking?

For me, it is an ongoing goal. 

You are special, made by God. His love for you is eternal and has no end.

May your day be surrounded by moments that remind you of your uniqueness in God. 
Be inspired, Be blessed
Raquel


Memories Album using Tonic Keepsake Dies

Hi friends, 
Today I'd like to share with you my very first album made using Tonic Studios Keepsake dies. These are sure to become a new favorite, and I hope that you can use my pictures for inspiration. This book was made rather easily, and I used different techniques to showcase the pretty papers as well as the message I wanted to convey. The results were exactly what I wanted, and I am very pleased!

On the cover I included the Sentiment :Memories, provided with the die set. It is added in gold, layered with laces, tulle, an antique brass button, chipboard swirl,  and an altered bird die cut from Tim Holtz.

On the first page I repeated the bird motif ( one of my favorites!) This one in blue acetate, and made a place where you can tuck a note or a special picture. 

The page has gold-ribbon pulls that open to reveal a full page with a delicate lace border. I love the paper in this collection from Maggie Holmes, as it is colorful and happy!

The second page layout has an inlay decoration. I topped the golden swirl with butterflies, and added a large belly band using Memory Book dies on the opposing page. I also added colorful enameled dots, and an antique ribbon closure. 


These pages open to reveal more room for pictures, and the belly band houses a large tag with a beautiful scalloped edge and pink glimmer ribbon.

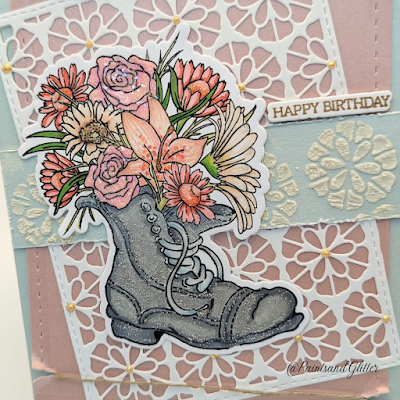
 This is the third page layout, with a thinner belly band topped with the same butterfly image, and a larger pocket that reads: Celebrate The Simple Things. I have also added a large stamped Tulip image. I thought the large black and White flower image complemented the layout perfectly.
This is also a hidden page, and is the perfect place for journaling, or more pictures.
The same page also opens up to reveal yet two more pages on back, and a lovely little gray doe and flower cluster.

This is the card peeking out of the pocket. It reads : Party, and has layers of shiny tulle, gold washi tape, an acetate dragonfly and little genuine antique pearl buttons.

The fourth layout is fantastically girly. I added a magnetized closure topped with a pink sway who is embellished with a black bow, and the complementing page houses three tags. 

Here you can see the tags as well as the interior of the page. There is a beautiful scalloped edge, and one tag reads: Create Beautiful Memories.

This Gorgeous layout adds some vibrancy to this little book. I used vellum in a coordinating yellow, and added flowers as well as pink pearls. The complementing page repeats a window with a flower trellis, and it is topped with the bird motif. This time, in a soft white. 

This is the hidden card set for the fourth page layout. I absolutely love the simplicity and elegance of these cards.

 Here is the fifth page layout, where I added the Love sentiment, and another half-page pocket. The complimenting page has a little blue bird, repeating the sentiment, with added glittered and acetate flowers.
The hidden card is topped with a beautiful bird image, as well as golden bow and stitched leaves. The small added ticket reads: Special Moments.

 My last and final layout for this book is entirely whimsical. I made a side-opening page topped with a large embellishment made with matching layered dies, tulle, and a ballerina I embellished with a large black bow.
Here is the first page layout when untying the ribbon.

This page further opens to reveal more room for pictures. 

These are my handmade embellishments. 

I used dies to design this page. 

I love to incorporate kind sentiments from the ephemera by altering them to fit my style.

A closeup of the golden swirls...

This  little bird was my inspiration, as birds have a huge significance in my life!


I hope that you have enjoyed looking at my work, and that you can 
Be inspired, Be Blessed!
Raquel


Here's my latest project!

Boots & Bouquets, TCK#74

Hello friends, Today is reveal day for Tonic's craft kit: Boots & Bouquets. This is easily the greatest value available for exclusiv...