Paints and Glitter © art with encouragement

Hello and welcome to Paints and Glitter. Here you will find a collection of crafty projects made to inspire and encourage you. Each day is a great opportunity to develop a new skill in paper crafting. My aim is to share projects that will make you want to keep sharing, learning, and expressing kindness one piece of paper at a time. Paints and glitter are my invitation to get messy, have fun, and be someone's sparkle!

  • Home
  • Download
  • Social
  • Projects
    • Cards
    • Theme
      • Birthday
      • Christmas
      • Masculine
      • Sympathy
      • Shabby Chic
    • Mini Albums
    • 3D Projects


Hello crafty friends!
Tonic Studios has sent me the Toy Box Bonanza die set to make some sample tutorials. After creating a patriotic spaceship, I decided to break out some shimmer powders and my sewing machine to let my imagination play. The results were not only fun, but a vibrant and textured juicy palette of colors! Today I will focus on the coloring process, and my video will give you more details. (The assembly of the actual box is the same as the spaceship, so I won't repeat that here, instead, I will refer you to the original tutorial for assembly.)


This is what I love most about paper crafting; the opportunity to have some fun without worrying so much about results, and just enjoying the process.
For this project, I used mixed media papers for the colorful layers, and just added a generous amount of shimmer powders in different colors to achieve stunning results. Shimmer powders react wonderfully to a good spritz of water, but did you know, that using a dry watercolor brush will help you add texture? I began by using Falling leaves shimmer powder and a Nuvo light Mist spray bottle, I gave the paper a generous spray of water after adding the powder, then used a soft watercolor brush to drag the wet medium across the entire paper with straight and squiggly lines, resulting in striated strokes that would resemble a watermelon rind. (In my video tutorial you will see how I did this, but I did repeat this more than once for the final results.)


For the inner portion I used Catherine Wheel Nuvo Shimmer powder, and this was quite intense! The color is so vibrant, and it will get onto your hands. You may want to use gloves if getting messy is not your thing. Because I used the papers with the Toy Box Bonanza dies, I had quite some cleanup to do! This was easy as it is a water soluble medium, but don't say I didn't warn you!
Once all of my papers were cut, I used my sewing machine to stitch green lines and borders onto the green papers to further resemble the striated lines one sees on a watermelon rind. For the inner portions, I also ensured to cut the papers to fit into the box, as these colored papers were merely for outer and inner layers. For the seeds. I used Meteorite Shower powder onto black cardstock, and dried it with my Heat It tool. 


To further decorate this box, I used Little Birdie flowers, and not only cut these to create the look I wanted, but also managed to color the centers of a few using the same red shimmer powder. The trick to do this is to only use as much water as necessary so as to not destroy the delicate blooms. Once these were added, I also added highlights with a white Nuvo gel pen, sequins, clear gems, and a stunningly crinkled double bow made with seam binding. I used hot glue, Nuvo deluxe adhesive, and Nuvo Crystal glaze as my adhesives. I truly hope you have enjoyed today's crafty tutorial, and that you consider trying these products in your next crafy project. Affiliate links will allow you to shop for mentioned items, and also help me keep a cup of coffee nearby as I craft.
Thank you for your support! 
Be inspired, Be Blessed!
Supplies: 

U.S.:
Toy Box Bonanza - Create & Make Die Set
Nuvo Shimmer Powder
Little Birdie Flowers
Tim Holtz Scissors


UK:(you can order worldwide, outside of U.S.):
Toy Box Bonanza - Create & Make Die Set
Nuvo - 2 Pack Of White Gel Pens
Tim Holtz Scissors

Video Tutorial:


 Hello crafty friends!

Welcome back to my blog! Today's make is a tent card featuring the exclusive items from the Tonic Studios Craft Kit : Easter Buddy Box.

**This is a picture heavy post! The Box tutorial is linked at the end!


As a side note: As part of the design team, I receive craft kits from Tonic Studios to make samples for you to see how many ways you can use the supplies included, and it's always a great deal of fun to find out what will be in the box! Every kit has standard items for you to craft with, and some surprise items that will remain exclusive to the kit release. 

 As the title of the kit implies, you can create a 3D box which you can transform into little bunnies, chicks, or decorative eggs. The video tutorial for the box will be linked below. Now back to the card!

You will note the sizes of all items listed in the photos below. 

Begin by cutting all of your matting layers, and create two base pieces with white 300gsm card. Layer the ivory and green card, placing the largest egg die on top of the ivory card, cented this die ensuring to leave at least an inch distance from the top and bottom of the matting layer. Secure it with low tack tape. 

Once you have positioned your papers correctly, layer the card by placing a tiny dot of adhesive to attach the ivory, green, and white layers. Be sure to only apply the adhesive in the center of the egg shape. Now run this through your die cutting machine, making sure to stop before the end of the matting layers. 


Once you have cut the egg aperture into these layers, you can now adhere the matting layers onto the front of panel A. 


Now flip this paper over, and add the matting layers to the inside of the card, then adhere the bottom most portion of panel A onto the bottom of Panel B. You can see by the photo above, that these pieces will overlap, and you will have a tab on the right. The right hand photo shows how panel A should look before adhering it to panel B to create the tent card. 
Before closing the card, you can decorate the inside of panel B using the corresponding matting layers, and a sentiment. This will be visible through the aperture created in panel A. Now you can adhere the top facing tab onto the back of panel A to close the card. 


Once the card is closed, use the remaining dies to create a scene. I focused on the smallest egg shaped die included to create the decorative trio of eggs and chicks, including the hatched chick created with the same size die. This shows you how simply by changing the color of the paper used, you can easily  transform an embellishment! To make the blue egg, use decorative egg die to cut the zigzag layer, adhere onto the small blue egg, and cut away the top edge to reveal the cracked shell. Use a ball tool  and foam adhesive to both shape the flowers and chick wings before adding them to your card for more movement and volume. Lastly, top off your die cut elements with the Nuvo drops and white gel pen included in your kit. The result will be a playful card ready for spring!! 

I celebrate Resurrection Sunday, and will be using this kit to create spring themed projects, but I hope you will enjoy using the different elements and find this tutorial useful. Please watch my video tutorial for any other details and leavc a comment letting me know if you'll be trying this out! 

Use of the affiliate links below for purchase will allow me to receive a small comission at no extra cost to you and you can grab this awesome kit, with no further obligations, or subscribe to future kits to enjoy 10% off any other purchases from Tonic Studios. 
Thank you for visiting, and don't forget to subscribe for future ideas!

Be inspired, Be blessed!


Easter Buddy Box U.K.
Easter Buddy Box U.S.


Hello crafty friends!

I'm stopping by to invite you to my tutorial featuring the Tonic Studios Retro Radio Gift box die set. This adorable little box has some special features such as a moving adjustable handle, and a working knob that allows you to "tune in" to your favorite station! I think Tonic's 3D projects are always special, and this is no exception!

Bright and happy colors lift the mood like a good melody, and you may already know that holographic mirror card is one of my personal favorites, so that prompted my selection of colors that easily match this light but colorful palette. I also love adding texture upon texture to my makes, and to do so on this project, I used a special 3D embossing folder from Tonic Studios for a wood-like appearance.

*for a special tip: Spritz your paper with a little water when placing inside your 3D embossing folder. This allows the paper to stretch a little more without cracking!*

I found this project to be quite fun, as I am a music lover, and have a professional musician as a son, and absolutely love that both of my boys are musically talented. What a blessing!

As for the items used in this project, I've assembled an affiliate list for you below, and hope you use it to get your hands on this beauty. Using these links will allow me a small compensation from Tonic Studios, and I will only recommend items I personally use. This set surely won't be around for long, and you'll reach for it time and again. Thank you for your time!

Be inspired, Be Blessed!


Tonic Studios US

Tonic Studios UK

3D Embossing folders Available U.S.

Winter’s Veil Wooden Texture 3D Embossing Folder U.K.

Paper & Card U.S.

Paper & Card (UK)

Adhesive (U.S.)

Adhesives (U.K.)

Scissors (U.S.)

Scissors (U.K.)


Hi crafty friends!
Today's post features a 5" square card with my signature texture and detail overload! I have used the Lovely Layers Stitched Elements from HoneyBee Stamps, along with the Circle Embroidery Hoops. Included in the collection are two different sized hoops and 24 element dies that allow you to truly personalize each hoop to your liking.
For the heart trio, I used different colored thread, and stitched onto the pierced paper hoop center, before adding it onto paper that I colored with distress ink and splattered with pearlescent watercolor. The hoop is also colored with Nuvo embellishment mousse, and so are several of the buttons.
One of my favorite elements is the small thread spool, which does include a matching thread die, but I chose to wrap with pretty red twine to match the buttons afinished it with a small heart charm.


Use patterned paper to create your own envelopes. I did so here, using a WeRMemory Keepers punch board. 


For the background I chose a 3D embossing folder from Spellbinders called Distress Mix to add more texture and topped the paper with white ink to help the different images stand out with a delicate color.
For the sentiment, I used a Glitter Wishes sentiment from Spellbinders and gold foil with the help of the Hot Foil system. To make the thimble look realistic, I used holographic foil which I adhered to paper, then cut out using the layered dies. 
This completes my card, and I hope you've been ablle to see how all of these different items can be used for a one-of-a-kind card. All of the items mentioned can be found at ScrapbookPal, and I will leave affiliate links for you to take a peek at what is available. I will only recommend products that I personally use.
Thank you for stopping by, leave a comment, and as always, 
Be inspired, Be Blessed!
Honey Bee Stamps - Honey Cuts - Lovely Layers: Stitching Elements
Honey Bee Stamps - Honey Cuts - Lovely Layers: Circle Embroidery Hoop
Spellbinders - Glimmer Hot Foil System, Silver
Spellbinders - Glimmer Hot Foil - Matte Gold
Ranger Ink - Tim Holtz - Distress Mini Oxide Ink Pads - Kit 7
Spellbinders - Beautifully Imperfect Collection - 3D Embossing Folder - Distress Mix
Honey Bee Stamps - Ink Pad - Brilliant White Pigment Ink
My Sweet Petunia - Precision Glue Press


Hello crafters!
I am sharing a coloring tutorial created with supplies from GinaK. This was my first time using her darling stamps and coordinating dies. My card tutorial includes the different Copic color combinations I selected to create three different A2 size cards. 
To keep this tutorial super simple I decided to use the same card base sizes and colors. The focus of each card was the pairing of the cute little critters in the stamp collection. To make sure they stood out, I also combined the images with different stamp-shaped backgrounds.
These cards are perfect for any time of the year, and the sentiments can be used separately, as they also have coordinating dies, which makes it super easy to reach for in a pinch!
You will notice that I took creative license with one of the images, and transformed it into a racoon by simply using black and white ink to add little details. This is an easy technique you can use with a little imagination.
I do hope you have enjoyed this tutorial, and you can watch me make more cards like these on my Youtube channel, so be sure to subscribe and click the notification  bell to stay in touch, or save this page to your bookmark bar!
This post contains affiliate links that allow me a small comission should you use them to shop. I will only recommend products I personally use.  
You will find the supplies listed below for your convenience.
Be inspired, Be Blessed!
Description 2
Description 3
Gina K. Designs - Clear Stamps - Heart of the Forest
Gina K. Designs - Dies - Heart of the Forest
Pinkfresh Studio - Dies - Essentials: Dotted Postage Square
Copics
Adhesives
Nuvo - Crystal Glaze
My Sweet Petunia (Glue Gun)


Hello friends,

Today is reveal day for Tonic's craft kit: Boots & Bouquets. This is easily the greatest value available for exclusive craft dies and stamps.
To get a kit, all you have to do is choose between your available options.
Are you new to crafting?
You may opt for a one-time purchase. More seasoned crafter? You can get a quarterly subscription.

Floral texture created with Nuvo Expanding Mousse, and stencil created with die cut from kit.
Boot texture created with Nuvo Stone Drop from kit.

What if you're a seasoned crafter, and like to receive kits every month with exclusive stamps and dies, as well as trusted mixed media products, and did I mention, no commitment, and a 10 % discount code for all other purchases? If that's you, then you can also opt for a quarterly, or monthly subscription! No penalties, no hidden fees, and everyone gets the same great value!


Here I used some of the Nuvo expanding mousse. It's a paste, but it expands when heated. How fun is that! I also used Nuvo Stone drops.  These come in different colors and give your cards the texture of sand.

I used Nuvo drops to add color and texture.


All of these cards were easily made using the stamps, dies, and 10 Nuvo Alcohol Pens included in this month's kit. That is an amazing value on top of the exclusive stamps, dies, specialty papers, and delivery to your front door!


We also offer free tutorials for inspiration at your fingertips. My video is linked below. Don't forget to subscribe and save my video to your playlist for convenient viewing at your leisure. I hope to hear from you, and as always, that you 
Be inspired, Be Blessed!
~RaquelSK

Affiliate links available*
TCK code available with subscription only. 
No penalties for termination of subscription.

Double Slider card

Easel Card created with the small flower stamps & dies.

Mirror Card with Acetate Wheel created with dies & papers from kit.


TCK USA

TCK UK

 YoutubeTutorial


Hi crafters, 
Today I am bringing you samples made with the Tonic Studios Craft Kit: A Lifetime of Adventure.
This is a great little kit, as it allows you to create not only a mini-album, but some amazing mixed-media cards. 
Below are some ways in which you can use the items available in this kit. This post includes affiliate links, and links to helpful unboxing and tutorial videos on my Youtube channel. 
Enjoy!
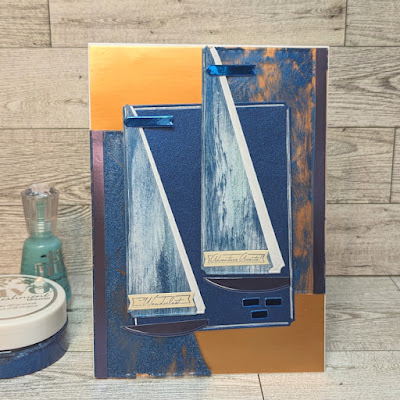
This is the cover of the adorable 5x5".25" mini album. I used the 6"x6" Craft Perfect Paper collection: The Blue Hues. This collection includes a total of 24 papers in 4 colors: Imperial Blue, Cobalt Velour, Blue Obsidian, and Turkish Turquoise. It is a mirror card collection full of shine and gorgeous color payoff. The Cover of my book includes the Imperial Blue color (Sail Die Cut, Sentiment Strip), along with Turkish Turquoise (Small banners on sentiments). The Turquoise Lake glitter paper was also included in the kit.

Here is the open book. It contains 4 pages with pockets. These are attached with Marigold Yellow twine. On the knotted twine is one element from this kit: A luggage tag, cut out of the gorgeous Turkish Turquoise mirror card. I used the same color mirror card on the pocket to the right. This is also inlaid with the small pieces from the opposing page. All pages also have matching inserts, which are topped with different sized tabs. They are an adorable touch to this small book! 

Here is another look at this mini album. The page colors alternate using both Teal Blue and Ocean Blue card, each containing a picture frame. The base, and white matting layers are made with 300gsm cardstock, and the remaining layers are made with Cream, and Ginger Pie card from the kit. I used sentiments and images from the kit, which I stamped and heat-embossed onto the cream card with coordinating colors. The small tag with sailboats is also topped with the included stone drop in Lady Liberty. Its sandy texture is perfect for this tiny ocean-like scene.


Here is a close-up of the small tags I created to add to the small pockets. They are stamped with a sailboat, airplanes, trail, and heart. All of the images are part of the stamp set in this kit.

Affiliate links will allow you to shop and sign up for the monthly kit subscription, or purchase a one-off kit. No commitments, no hassle!

US: https://shrsl.com/43fkv
 
UK: https://shrsl.com/45g9u

I also had some fun with the Nuvo Embellishment Mousse from this kit. I used it in two ways: on vellum, as seen on the easel card, and on the acetate carrier sheet containing the dies in this kit, as seen on the sailboat card. This is yet another way to expand your options in card-making. 


Finished result of Circle Easel card with Nuvo Mousse.


Masculine card made with Nuvo Mousse, Sand Drops, and Specialty papers.
Mousse and Drops applied to Acetate sheet.


Hi Crafters!
I hope you're having a fabulous day! Today I've had the pleasure of working with the Bouquet & Buttermilk stamps and die set from Tonic studios. This is a darling set that comes with a total of 24 dies and 19 stamps. It is perfect for the type of card you only have five minutes to make, as well as the elaborate cards I'm sharing with you today.


Sentiment: Someone Special

My first sample begins with a base created by layering four panels created with the Scalloped Heart Layering die set. I wanted to make a momochromatic Easel card, suitable for several occasions. The backdrop is topped with Nuvo Crystal drops on the entire perimeter. The stems and flowers have all been colored using different Nuvo alcohol markers. The bouquet is wrapped in vellum and purple parchment, and small groupings are used along a sentiment strip to hold the card once opened.


Bow included in the Kit in Glitter Card

Here you can take a closer look and see how I added the small white tag included in the kit, and the flowers are topped with purple microbeads as well as nuvo drops. The bouquet is also wrapped in embroidery floss for an extra touch of texture. The parchment paper adds elegance to this small bouquet.


Hello is stamped in Green, and heat embossed

Here is my second sample, and my favorite! I love to add a touch of whimsy to my cards, and this is a perfect example of this. I placed the bouquet on a base panel created with the Mini Slimline Love Hearts Die Set. This gave my card the perfect size scallop border to match the delicate flowers. 

Craft Perfect Card is all from Tonic

A closer look allows you to admire the reflection of the stems and flowers. These were colored using different Nuvo Mousses. Some flowers are topped with Mirror Card, and yet others are placed atop heat-embossed flowers that cast a soft shadow.

Now for the Buttermilk Jar! This was a fun card to make, and I used Nuvo Crackle Mousse as well as Hybrid ink to have some fun! The background features the word shadow die cuts, only here I've used them as wood planks. They are inked and topped with a wash of Nuvo Expanding mousse for a hint of copper. he wall is splattered with shimmer powder in Meteorite Shower. 
The buttermilk jars are stamped and colored to give them the look of old weathered patina, and the stems are colored using Nuvo Hybrid ink to match. Lastly, the table top on this card is adorned with a doily cut out with the Double Decorative Header Folds Florals. The shadow is cut in vellum, and the table is dark gray card that's been colored with Crackle Mousse for some excellent texture!
I had fun making these samples and invite you to use my affiliate links for all of the products mentioned as well as my Youtube channel, where I also share details not mentioned here.

As always, may you Be inspired, Be Blessed!
~Raquel SK

Affiliate links will allow you ease of purchase below:

U.S.: Bouquet & Buttermilk stamps and die
U.K.: Currently Sold Out
U.S.:

Craft Perfect - Weave Textured Classic Card - Oyster Gray - 8.5"x11" (10/PK)

Mini Slimline Love Hearts Die Set - 5069E

Embellishment Mousse:

Shimmer Powder:

Scalloped Heart Layering Die Set - 4491E

Nuvo Drops

Nuvo Ink Pads US

UK:


Mini Slimline Love Hearts Die Set - 5069E

Shimmer Powder

Scalloped Heart Layering Die Set - 4491E

Nuvo Drops

Adhesives

Nuvo Ink Pads


Newer Posts Older Posts Home

Affiliate Links

  • Tonic Studios
  • Tonic Studios UK
  • Scrapbook Pal
  • Simon Says Stamp
  • Paper Rose
  • Spellbinders Paper Arts
  • A Cherry On Top
  • Scrapbook.com

ABOUT ME

...For where your treasure is, there your heart will also be... Matthew 6:21

My Video Channel

My Video Channel

SUBSCRIBE & FOLLOW

Get new posts by mail
Powered by follow.it

Disclosure

On this page you may see some of my Design Team work. I will only use items I am happy creating with, and all opinions are my own. I participate in several affiliate programs (including Tonic Studios, ScrapbookPal, Paper Rose, Simon Says Stamp, Scrapbook.com, and others). This means that I receive a small commission when products are purchased through links I share here (at no additional cost to you). If you like my projects, please consider supporting my blog by clicking through these links when you shop. I appreciate your time, and hope you leave encouraged to try something new!

Stores I Love!

A Cherry On Top Scrapbook.com Simon Says Stamp

Contact Form

Name

Email *

Message *

Search This Blog

Design Teams

Current Design Teams: Tonic Studios, ScrapbookPal Past Design Teams: Paper Rose Studio Reneabouquets Kokorosa KSCrafts Guest Design: CraftStash Decor8YourLife
Paints and Glitter Copyright . Powered by Blogger.

Content Protection

Former DT member Paper Rose Studio

Former DT member Paper Rose Studio
I highly recommend papers from Paper Rose. This Australian international company has superb service and quality!

© [2026] [PaintsandGlitter]. All Rights Reserved.

You May Also Like

  • Tonic Studios TCK 101: Easter Buddy Box
  • Tonic Studios : A Lifetime of Adventure
  • Tonic Studios Retro Radio
  • Boots & Bouquets, TCK#74

Categories

Tonic Studios 19 Card 5 Spellbinders 5 3D crafts 2 Memory Book 1

Labels

  • Cards 2

Copyright © Kinsley Theme. Designed by OddThemes